
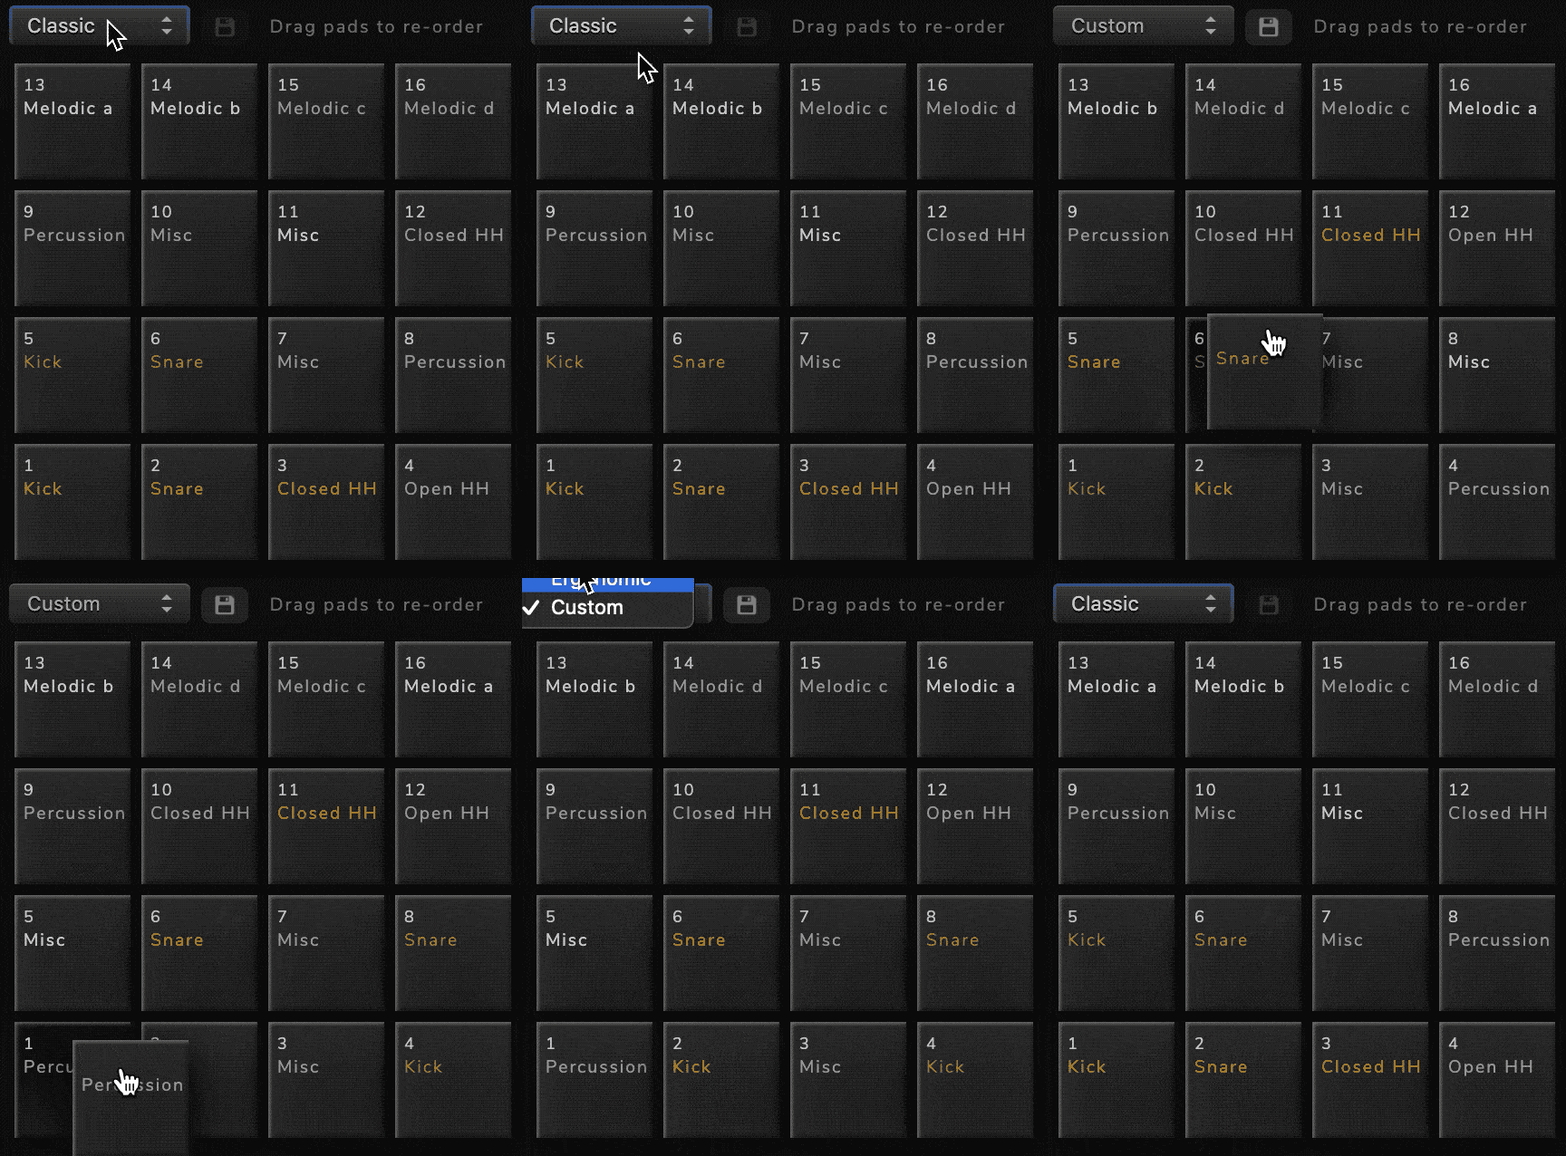
Choose a provided pad layout from the drop down, or drag and swap pad positions to create your own layout.
Press the Save button and Kit Maker will retain your Custom pad layout for future use.
Pad Labels
Pads labeled in orange are the primary pads. There can be a lot if variation in the types of samples that comprise each Maschine kit, but the primary pads are almost always the same throughout (two snares, two kicks and a closed hi hat).
These also show up as orange in the Sample Pack pad layout. These happen to be the most important drum sounds. When making a layout, it can help to visualize where your main samples will be.
Brighter labels indicate pads that take priority. In a Maschine kit, for example, there are often multiples of the same sample type, such as “Kick 1” and “Kick 2”. The brighter pad label indicates the first sample (“Kick 1” in this case).
When making Sample Pack kits, the same rule applies; the brighter pad will always be assigned first. In a case where Kit Maker only has one Kick sample left to use, for instance, it will be applied to the Kick pad with the brighter label.
Using Alternative Pad Categories
Although you can’t change the name of the pad categories in Kit Maker, you can use the pad categories for any type of sound you choose. The categories are merely suggestions!
Example:
If you primarily use electronic themed Sample Packs, you might not have any “Percussion” samples, but you can add “fx” to the Percussion categories keyword list (on the Folder Keywords page). The FX samples from your Sample Packs will now placed on pads labeled “Percussion”.
Want to get even more customized? Check out this article!