
The latest Kit Maker version is 2.4.0 – Link
All Windows users are recommended to update to version 2.4 or higher.
A bug that sometimes created empty pads on many Sample Pack kits has been fixed!
Learn about the Update Here! 😎
In Kit Maker, the version is displayed next to the logo. On older versions, check the “About” page in the top left menu. You can always check for updates in the menu under Help > Check for Updates
Library Types
(Sample Packs & Maschine Expansions)
There are 2 forms of libraries Kit Maker can accept:
Maschine Library folders
Official Maschine / Native Instruments Expansion Libraries
Sample Pack folders
Any other drum sample pack that contains .wav one shot drum samples
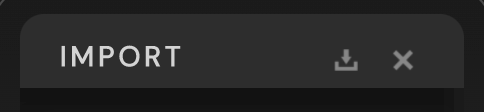
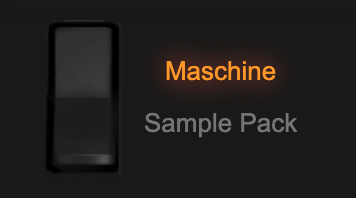
Use the switch to choose the library mode, drag your Maschine Library or Sample Pack folders into the “Insert Libraries” box, or use the import button.
There is also a button to “clear” the current imported folders (the “X” button)
Before pressing “Make Kits”, select the correct library mode depending on which kind of library folder you are processing. If a folder of the wrong type is found, you will be alerted to change modes.
Multiple Maschine Libraries can be processed at once, or multiple Sample Packs can be processed at once, but you cannot process both forms of libraries together (ie a Maschine library and a Sample Pack both at once).
Note: The larger amount of files and libraries, the longer it will take to process. The moving gear animation on the screen shows that the app is still libraries. The app may temporarily say “Application Not Responding” while it is processing. This is normal when processing large volumes of files.
Maschine Mode
Kit Maker can convert your Maschine Expansions into drum kits for various DAWs, it is as simple as dragging and dropping your Expansion folders and pressing “Make Kits”. Kit Maker was even promoted by Native Instruments themselves on their blog, as a recommended way to use Maschine kits with other software and hardware!
Maschine Libraries are an accepted source of samples to convert for other various DAWs, but Kit Maker does not directly create Maschine presets to be used inside the Maschine software.
If you want to convert Sample Packs into Maschine Kits, you will need to use the Numbered Files format. It is a quick and easy way to make kits for Maschine, but does not create the encrypted Maschine kit presets directly.
About the Maschine Expansion folders
When you installed your official Maschine Expansions via NI, the folders were named after the Expansion title and are installed along with your other Native Instruments installed libraries. Each Maschine Expansion folders typically has these subfolders inside titled: Groups, Documentation, Projects, Samples, Sounds etc.
To import an expansion folder, drag the Expansion folder itself (such as “Amplified Funk”) into Kit Maker.
These folders on Mac computers will often have the word “Library” at the end of them (ie “Amplified Funk Library”).
Kit Maker also works with the Machine Factory Library (titled “Maschine 2” or “Maschine 2 Library”).
The pad names in Maschine mode reflect the most common sounds in a typical Maschine kit. Each Maschine kit preset will be made using the same samples and kit name of the original Maschine Kit.
Where are the Maschine Expansion folders located?
In the Maschine app Preferences, go the the Library tab. Click on the small Directory icon next to the Maschine 2 Factory Library path. This will show the directory of the Factory Library. The Expansions are installed in the same location. More info on finding your Maschine Library locations can be found on the Maschine Mode help page.
For Mac users, the default Maschine Library install locations are in the Users/Shared directory.
Note: When using the Classic layout, the pads will be in a very similar order to the original kits as they appear in the Maschine software. The primary (orange labeled) pads will be in the same positions as the original Maschine kits, but some of the more obscure sample sounds may be in slightly different positions.
Unofficial third party libraries will not process correctly in Maschine mode and I do not advertise the app to do this. Please only use official Expansions in Maschine Mode.
However, if the third party expansion is organized by either folders or filenames, you can try and process the expansion in Sample Pack Mode.
Having issues with your kits in Maschine Mode?
There is more info on the Maschine Mode Help page!
Sample Pack Mode
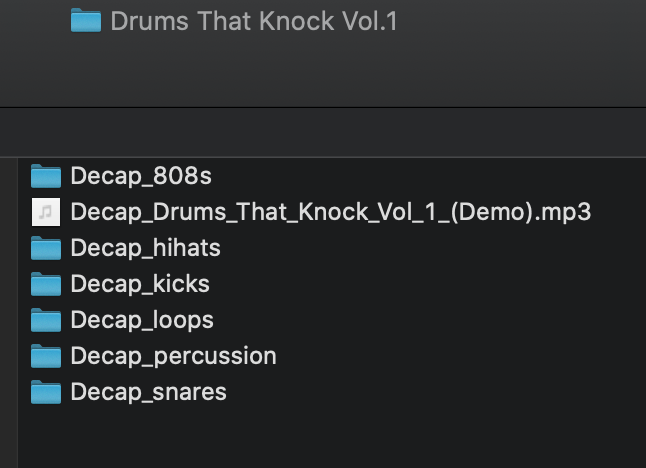
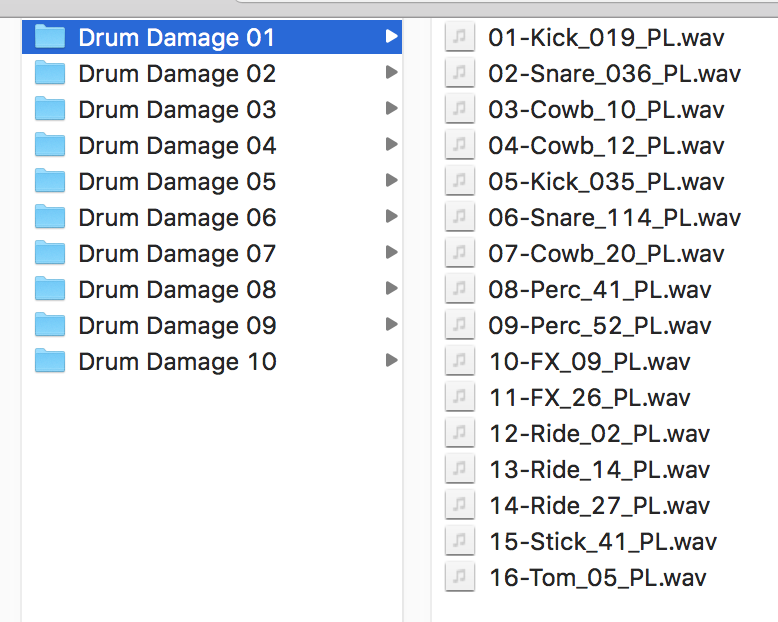
Use Sample Pack mode to process any folder that contains samples organized into subfolders (ie “Kicks”, “Snares” folders) or has labeled filenames (ie “Heavy kick.wav” , “Trap snare.wav”).
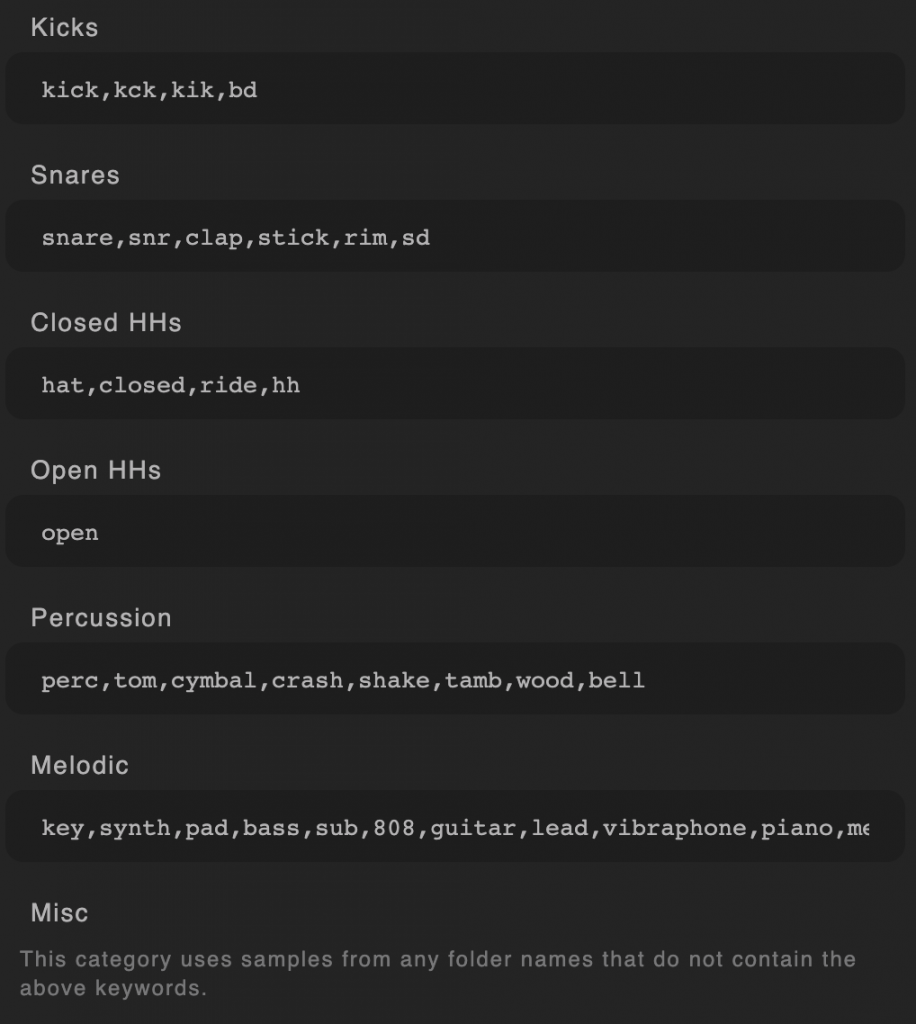
Most Sample Packs include contain folders that are named by category. These drum categories determine how Kit Maker will lay out the samples on the pads of each kit. The “Kick” pads will be filled with samples from the folder with “kick” (or another “Kick” keyword such as “kik” or “kck”) in its’ title.
What if the pack isn’t organized well?
If Kit Maker finds less than 3 subfolders named after drum categories, it will automatically sort the samples into categories by reading the filenames instead.
What if the pack is organized into pre-grouped Kit folders already?
If a pack is already grouped into folders per kit, rather than collections of drum categories, you can use the “Process Pre-Grouped Kits” option, explained lower in the manual.
PC USERS: Empty pads randomly occurring in Sample Pack kits?
Check out the version 2.4 Bug Fix recommended for Windows users
Keywords
By default, Kit Maker is set up with common keywords to organize your samples automatically. But, if you want to organize them differently, you are free to edit the keywords or add your own in the Keywords section of the Preferences.
Whenever you update Kit Maker, it is good to reset the Keywords, which may have additional Keywords I add over time.
However, if you save your own custom Keywords, you will need to add them again resetting.
Having issues with your kits in Sample Pack Mode?
View the Sample Pack Mode Help page!
It focuses on common fixes and tips for converting Sample Packs.
How the Samples Get Sorted
Samples will be placed on pads until no more samples of that category are available. If there are no samples left of an individual pad’s category (for example a Kick pad), other samples may be placed on that pad (for example an available Hi Hat).
Kits generated at the end of the process may have empty pads. As the available number of samples becomes less (ie; the kick samples have all been used in earlier kits and there are no kick samples left). Kit Maker will continue making kits until there are no samples left. Because there are an unlimited combination of samples a Sample Pack may contain, it is often the case that many of the final kits will not have the exact balance of samples to make full kits.
Misc Samples work a Little Differently
The Misc category has a special ability. Misc (or Miscellaneous) samples are any samples that do not match any of the Keywords. In addition to filling the original “Misc” labeled pads, left-over Misc samples are always the first samples to fill in any available empty pads.
For example, if the first kits that are created use up all the Hi-hat samples, the Hi-hat pads will be available for other samples to be added in their place. In this process example, if there are available Snares, Kicks and Misc, the Misc samples will be the first to fill those empty Hi-hat pads.
This is because it is better to save those Snares and Kicks to be put in the next kits that are created in the process. This allows for more kits that are of good quality, that have important samples like Snares and Kicks on the correct pads.
TIP If your kits are ending up with too many empty pads, add samples in a folder called “Misc” (or any other word that is not in the Keywords). The Miscellaneous samples will fill up the empty pads without using up your other, more important samples like Snares and Kicks!
See the Sample Pack Options section (lower in the manual) for more options on using Sample Packs.
Filter Large Files
By default, large audio files (2mb or larger) are filtered out and skipped. This is because long, drawn-out audio samples typically are not the type of sounds producers want in their drum kits. However, if you want to allow all sizes of audio samples, you can disable this filter.
Process Pre-Grouped Kits (Folders of existing kits)
Some drum sample packs already have the kits pre-grouped into kit folders of up to 16 samples. These premade Kit folders already have a kick, snare, hi hat etc that work together well. These type of packs expect the user to use the samples of each “Kit” folder together; each folder already has drum samples that are meant to be in the same kit.
For these style of sample packs, use the Process Pre-Grouped Kits option found in the menu bar ( Extras > Process Pre-Grouped Kits).
Then choose the pack folder that contains the folders of pre-grouped kit folders. For example if a folder is called “Boom Bap Kits” and inside are folders called “Hard Kit”, “Street Kit”, “Loud Kit”, the user should select the parent folder called “Boom Bap Kits.” This will create kit presets from each 16-sample kit folder and title the kits correctly so you end up with “Hard Kit”, “Street Kit” etc as they were intended.
NOTE When using this feature, do not choose a single kit folder on its own, but rather the next folder directory up. Choose the folder that contains the kit folders as sub folders.
Process “Splice Beatmaker” Presets
Splice has a feature called “Splice Beatmaker” where you can buy pre-grouped kits on their sample service. These are pre-grouped kits as explained in the manual above in the Process Pre-Grouped Kits section.
In Kit Maker, choose the menu option “Process Splice Beatmaker Kits” (under Menu > Extras ). This should automatically find any downloaded Splice Beatmaker Kits you have on your computer and create organized, labeled kits from them.
Keep in mind that Splice Beatmaker Kits do not always come with a “full” 16-sample collection of sounds. Some kits have less than 16 samples, which of course will result in some some pads being empty on a 16 pad drum layout.
TIP If you know you have Splice Beatmaker Kits downloaded to your computer, but this option is not working, you can process the folder of Splice Beatmaker Kits manually by finding the folder manually and using the Process Pre-Grouped Kits option described above.
The folder to process is called “From Splice”:
Mac: Macintosh HD/Users/[your username]/Library/Application Support/Splice/Beatmaker/Presets/From Splice
Win: C:\Users\[your username]\AppData\Splice\Beatmaker\Presets\From Splice
More information on the Splice Beatmaker Kits directory can be found here.
Sort By Filename button (formally Auto-sort)
There is also an “Sort by Filename” button in the app (bottom left of main screen) — formally called Auto-sort.
This an advanced option to prepare your sample pack before importing it into Kit Maker.
NOTE Most users will not need to use this feature. It is an advanced feature for OCD levels of control. If a pack has less than 3 category folders, it will automatically be sorted by filenames in the normal Kit Maker “Make Kits” process.
Click the button, choose a sample pack folder and Kit Maker will use the filenames inside to create an organized copy of the sample pack, but the pack will now be organized by category folders. It creates this copy of the pack on your desktop. This gives you more control to reorganize a pack exactly how you want before you process it yourself. From there, you can further organize the pack or import it into Kit Maker.
The standard Sample Pack mode Import and process will already do the filename sorting process if a pack that has less than 3 category folders. Sorting by filenames is already built into the Kit Maker “Make Kits” function if this is the case.
The Sort By Filename button has the advantage of forcing a pack to be organized by filenames, even if it has category folders. And has the additional benefit of allowing the user to tweak the categories and sample organization before processing begins. For example, if you have a bunch of unorganized messy samples in a folder, and want to prepare and fine tune the pack and make sure it is organized the way you want.
Want more info on how to customize your kits in detail? Check out the article on Customizing Kit Maker Kits
Make Your Own Sample Pack
(and Make Kits From It)
NOTE Most users will not need to use this feature. It is from early Kit Maker days when the user had to pre-sort the samples into folders themselves. Now that Kit Maker can detect keywords in sample folders and sample names, it is not as necessary.
However, making your own sample pack from scratch can still be useful to have full control over exactly how your samples are categorized, and make it easy to get started making your own custom sample pack of various sounds.
If you have a Sample Pack that is not organized using folders or filenames, or you want to put together your own custom Sample Pack with the most control possible, click the “Make Blank Sample Pack” button to make a blank Sample Pack folder to use. This creates a new folder on your desktop that contains empty folders of each drum category type that Kit Maker uses (ie “Kicks”, “Snares”, “Percussion” etc)
Rename this folder anything you want (ie “Hard Trap Pack”), but leave the category sub-folders with their original titles (“Kicks”, “Snares” etc).
On your computer, copy your own samples into these empty sub-folders, depending on which sound types they are (“Kick” etc).
These samples will later be placed on pads as they are labeled in the pad layout.
About the Pad Labels
See the Pad Labels section under Layouts and Customizing Kits
Layouts and Customizing Kits
Choose a provided pad layout from the drop down, or drag and swap pad positions to create your own layout.
Press the Save button and Kit Maker will retain your Custom pad layout for future use.
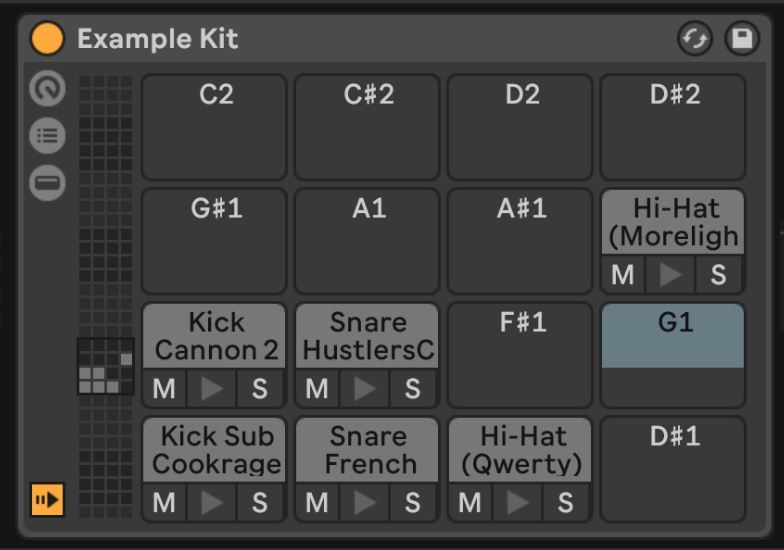
Pad Labels
Pads labeled in orange are the primary pads. There can be a lot if variation in the types of samples that comprise each Maschine kit, but the primary pads are almost always the same throughout (two snares, two kicks and a closed hi hat).
These also show up as orange in the Sample Pack pad layout. These happen to be the most important drum sounds. When making a layout, it can help to visualize where your main samples will be.
Brighter labels indicate pads that take priority. In a Maschine kit, for example, there are often multiples of the same sample type, such as “Kick 1” and “Kick 2”. The brighter pad label indicates the first sample (“Kick 1” in this case).
When making Sample Pack kits, the same rule applies; the brighter pad will always be assigned first. In a case where Kit Maker only has one Kick sample left to use, for instance, it will be applied to the Kick pad with the brighter label.
Using Alternative Pad Categories
Although you can’t change the name of the pad categories in Kit Maker, you can use the pad categories for any type of sound you choose. The categories are merely suggestions!
Example:
If you primarily use electronic themed Sample Packs, you might not have any “Percussion” samples, but you can add “fx” to the Percussion categories keyword list (on the Folder Keywords page). The FX samples from your Sample Packs will now placed on pads labeled “Percussion”.
Want to get even more customized? Check out this article!
Preferences
Global Options
Number of Banks
For MPC and Ableton Live, you can have multiple “banks” inside one kit preset. This groups multiple kits into one preset. On MPC, you can have up to 8 banks (A through H on the MPC unit).
Ableton doesn’t have specific bank labels, but rather multiple 16 pad kits you can navigate between by clicking the vertical grid in drum rack, or using the vertical slider on the Push. There is a limit of 7 banks for Ableton presets. This is due to the way Ableton has positioned each kit region.
A kit preset with multiple banks will have a suffix with a dash followed by the number of banks (ie “Hard Trap Pack 01 – x4”). Maschine kit presets with multiple banks will be named after the first Maschine kit in the preset, followed by the suffix (ie “Majestic – x4”).
Kits Output Location
The default location for the Kit Maker Kits is on the Desktop, but you can change the location. Note that this option does not affect Ableton kits, which can be set in the Ableton Live section of the Preferences.
Organize by Filenames if Few Keyword Folders
When left enabled, Kit Maker will attempt to organize sample packs by finding keywords in their filenames, if there aren’t many drum category folders found.
Recreate Kits from .xpm
If .xpm files are found in the imported sample pack, the output kits will be created based on these original .xpm kits, using the same samples and kit titles. This process takes longer than the standard kit making process.
Sample Pack Mode Options
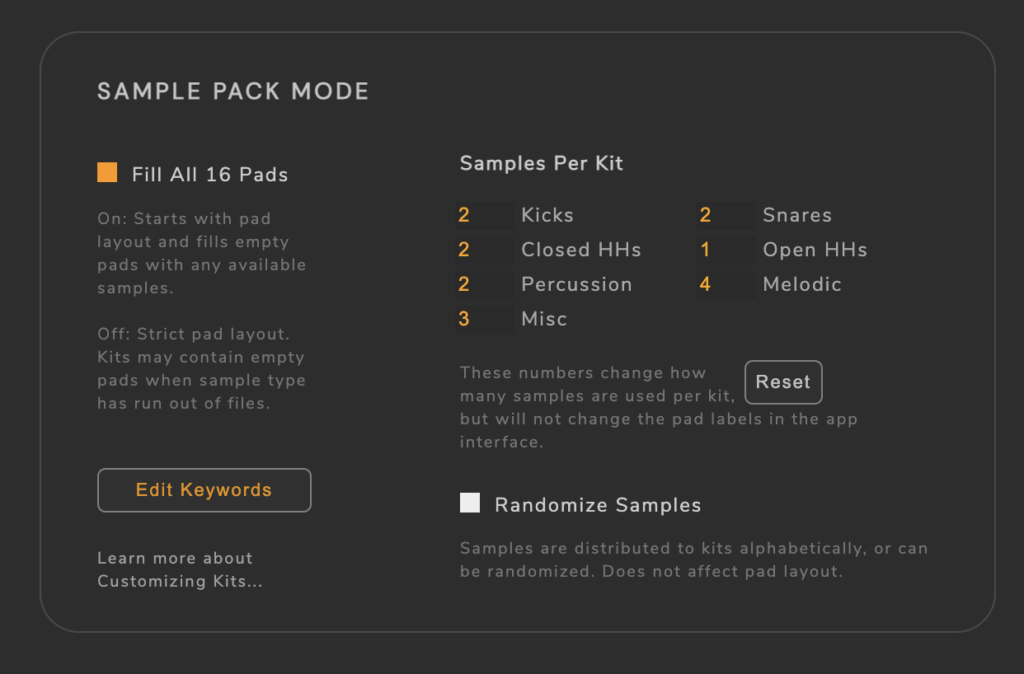
Samples Per Kit
I recommend that most people stick to the default setup, but it is possible to experiment with the number of sample types assigned to each kit. For example, raising the amount of Kick samples from 2 per kit, to 4 per kit. The more you change these numbers, the less likely they will match up with the default pad labels. Given the vast possibilities of user-set sample amounts, the kits will come out less predictably.
Randomize Samples
By default, samples are filled alphabetically. For example a file named “A Kick.wav” will be used before “B Kick.wav.”
With Randomize Samples enabled, the samples for each category are randomized. This does not affect the pad layouts.
This option is useful when several samples are named similarly. For example, you may have several samples named something like “Bass 1.wav” all the way up to “Bass 12.wav”. Normally, Kit Maker will assign samples alphabetically. This would mean that all your “Bass” titled samples would be lumped together in a few kits, instead of having your Bass samples spread out across all your kits. The randomization option creates more diverse individual kits by avoiding grouping similar file names together.
Fill All 16 Pads – On
This option is explained well in the tutorial video at the top of this page.
By default, the “Fill All 16 Pads” option (found in Preferences) is enabled. This makes sure that every kit has 16 samples. Without this on, sample files will only fill pads of their own category (ie kick samples filling kick pads). This essentially combines kits that did not have enough samples (of all the categories) to fill an entire kit.
Turning the option off will result in some kits having empty pads as samples of certain categories run out. More on that below.

With the option ON, a pad that ran out of samples for its’ category will be filled instead of being left empty. However, because that category of sound was out of samples (for example, there were no more closed kick sounds), a different sample type will be used to fill that otherwise empty spot (perhaps a closed hi hate sample will be used, if there are extra hi hat samples in that Sample Pack).
Fill All 16 Pads – Off
The benefit of turning this option off is that there will be more kits created (although with less samples per kit) and they will follow a more strict pad layout. For example, a user may have a Sample Pack that contains only kicks, snares and hi-hats. If they are just using these samples in their pattern, and want to make the most amount of kits to swap out and try different kit sounds, they may want to turn this option off.
Ableton Live Options
User Library
If you have a custom User Library location in your Ableton settings, make sure to save the same directory here. Otherwise the samples for the Ableton kit will be put in the wrong place, and the kits won’t properly link to the samples. There is a button to reset this to the default location.
Reveal Kits & Samples Folder
If you have trouble finding your kits, or need to troubleshoot where the files are being saved, use these two buttons.
User Library Help
This opens up our Ableton User Library Help page which has more information, as well as troubleshooting steps if you run into issues.
Ableton Kit Version
Use version ‘12.1 Simpler’, unless you are on an older version of Ableton Live (before version 12.1). Kit Maker starts with ’10 Simpler’ by default, so that older Ableton users don’t run into issues. But the app should prompt you and update this to version 12.1.
Tag kits with “Kit Maker” label
This “Tags” .adg kits with the “Kit Maker” tag by adding a folder of metadata files to the folder of kits. This is off by default. If you want to add the tag to kits you have already created, you can simply copy the metadata folder to your other Kit Maker folders of .adg kits.
Ableton Move & Note Options
Maschine Mode
Include Expansion Name in Kits
If you are making kits with the ‘Ableton Move & Note’ format, you can add the Expansion Name to the front of the names of the kits. This can be useful for when you have a long list of files in Ableton Note and want them to be more organized.
Alternatively, you can use the format “Ableton Note (folders)”, which has the benefit of organizing the kits into folders by Sample Pack or Expansion. However, this method is a more complex process to transfer the files and may be tricky for some users.
Maschine Mode Options
These options affect how kits will be made when processing Maschine Libraries or Komplete Expansions (but will not affect kits made in Sample Pack mode)
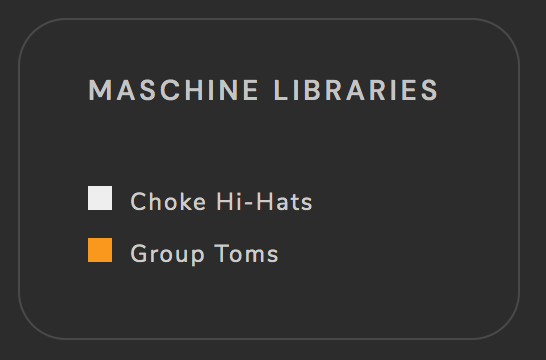
Choke Hi-Hats
Automatically puts the primary closed Hi hat and Primary open Hi Hat in the same choke group.
This feature is Compatible with:
- Ableton Live
- MPC (and MPC related products such as Force, Desktop software etc)
- NanoStudio 2
Group Toms
When a kit has 3 or more toms, they will be grouped together on the second row from the top. Note: Works best with the Classic layout.
Export Kits to Original Library Locations
Kits are created on the Desktop by default. Enabling this option generates kits in the same directory as libraries you import. Note: If you import libraries from multiple locations, a “Kit Maker Kits” folder will be made for each respective location. This option does not apply to Ableton kits.
Kit Formats
Deluge Kits
Once you have created your drum kits for Deluge, follow these instructions on how to import them:
Copy the content of the “KITS” folder to the KITS folder of the Deluge.
Copy the folder “KIT MAKER” to the SAMPLES/DRUMS folder of the Deluge.
The path should be [SDCARD]/SAMPLES/DRUMS/KIT MAKER
If the KIT MAKER folder already exists on your Deluge, copy the contents of KIT MAKER to your existing KIT MAKER folder.
Older Kit Maker Deluge users (2023 and earlier) must update to version 2.3 or above, which fixes a compatibility error that began in a Deluge firmware update. Kits created with the current Kit Maker version will work as expected.
Beatmaker 3 (iOS)
View The Kit Maker: Beatmaker 3 Video for overview and instructions. The video does not have the latest Kit Maker features such as automatic sorting, but it shows how to transfer the files.
Transfer your Beatmaker kits to your iOS device. They will be ready to load as presets. Go to the Transferring to iOS Devices section (below in the manual) for more information, or watch the Beatmaker video provided.
Beatmaker 3 accepted sample audio file formats: .wav
NOTE The format is bmk2 instead of bmk3 because of the encryption in the latter format. However, this does not affect the usability of the kits inside of Beatmaker 3.
When there is an empty pad, an “EMPTY.wav” file will be used, which is required for our app to make the bmk2 format.
The automatic Choke Hi-Hats option in the Kit Maker preferences does not apply to Beatmaker kits.
Nanostudio 2 (iOS)
Nanostudio 2 has been discontinued, and may not be visible as an option in the main list of Kit Maker formats.
View the top Menu > Formats to access the Nanostudio 2 option for processing.
View the Kit Maker: Nano Studio 2 Video for overview and instructions. The video does not have the latest Kit Maker features such as automatic sorting, but it shows how to transfer the files.
Transfer your Nanostudio 2 kits to your iOS device. They will be ready to load as presets. Go to the Transferring to iOS Devices section (below in the manual) for more information, or watch the Nanostudio 2 video provided.
MPC Desktop Software and MPC Beats
Kit Maker kits are compatible with modern MPC hardware (including X, Force etc), but can also be imported into modern MPC Desktop software, including MPC Beats. MPC controllers such as MPC Studio can be used with the desktop software.
Make sure you are in “Main Mode” (the house icon in the top left red menu of the app). In the bottom of the MPC Desktop (or MPC Beats) app you should see a “Project” window.
Find a converted drum sample pack that you want to import from the “Kit Maker Kits > MPC Kits” folder. For example a converted pack folder such as “Dark Trap”. Drag the converted pack folder onto the “Project” window in the MPC desktop app. It should populate with “Programs” which are the loadable MPC kits.
Double click a kit to load it in your drum rack.

Important: The MPC 2 app only allows .wav files with a 44100 sample rate.
MPC Hardware (MPC Live, MPC X, MPC One & Akai Force, etc)
Kit Maker kits are compatible with MPC2 as well as MPC3 firmware. They are also compatible with the full line of modern MPC hardware products that use the MPC interface.
Transfer the processed kits to your MPC. Watch the video or see your MPC model’s manual for info on how to do this. Once the kits are on your MPC, the .xpm program files are ready to load as presets.
NOTE MPCs only allow .wav files with a 44.1k sample rate.
Ableton Live
View the Kit Maker: Ableton Video for overview and instructions on creating Ableton drum kits.
There is an Ableton Live section of the Preferences which is explained earlier in this Manual.
Please read that section which explains additional options for Ableton Live which are not repeated here.
Once processed, Ableton kits can be found in your User Library.
User Library > Presets > Instruments > Kit Maker Kits
Sample files are stored in the User Library
User Library>Samples>Imported>Kit Maker Samples
The Ableton Live preferences have a section that shows exactly where your User Library location is on your computer.
By default, Kit Maker will save the files to the default User Library location on your computer.
The Kit Maker Preferences have helpful buttons to reveal where the Kits and Samples are being saved, if you have issues or need to troubleshoot and confirm their output.
IMPORTANT Do you use a custom location for your Ableton User Library? Remember to link to that folder in the Kit Maker Preferences. Visit this page for more info on Ableton drum kits and custom User Library locations.
TIP To make your kits quick to access in the future, drag the Kit Maker Kits folder to your Places sidebar in Ableton. The location of this folder is shown above.
If you want to re-process the same library over again (for example: you changed your mind and wanted to use a different layout etc), it is best to delete both that sample pack’s folder (the pack you are processing again – ie ‘Dark Trap Drums’) from both the Kit Maker Samples folder and Kit Maker Kits folder inside the User Library. Then you can process the library again.
Depending on the changes you made in the Preferences, you can sometimes get away with just reprocessing the pack (which will overwrite the .adg files). But it is recommended to delete the files first, which removes possible hiccups.
The imported samples must be kept in your Ableton User Library. Custom Ableton User Library locations are compatible with Kit Maker. Having your User Library on an external drive can be helpful if your local hard drive is low on space.
Ableton accepted sample audio file formats: .wav, .aiff, .mp3
Ableton Push
Kits can be used with Ableton Push, including Ableton Push 3. When controlling the desktop software with your Push, you can view and open kits from the Ableton Places sidebar (on the left of the Desktop Ableton Live screen). As said above, it is recommended to add the Kit Maker Kits folder here, which makes it very easy to access them from the Push controller.
For Push 3 standalone users, check out our article and video on how to transfer Ableton kits onto Push 3 Standalone.
EG Pulse
To use EG Pulse kits, transfer them to your iOS device and open the Files app on your device. You will need to have the kits on your actual device (not on a cloud server like Dropbox) in order for them to open correctly (EG Pulse may throw an error otherwise).
Open each kit one at a time. Each time you load a kit, it will be added to your list of available kits (but the currently loaded kit will not show up in the list immediately). Leave EG Pulse and go back to the Files app and open another kit and so on. After loading each kit, the previously loaded kits should show up in your list of kits. Unfortunately EG Pulse does not currently seem to have a way of importing multiple kits at a time.
Numbered Files
Make kits for even more DAWs and hardware!
The Numbered Files format is a quick “workaround” for quickly making kits for DAWs and devices that I can’t make direct kit “presets” for. This is usually due to the kit format being encrypted, or a kit format not existing at all (SP404 MKII for example).
The Numbered Files format creates “kit folders” which are finished kits that are ready to use. Simply drag the contents of a kit folder onto the first pad of an empty drum kit in your DAW. The kit is loaded automatically and in the correct layout!
This is not a random collection of samples in each folder. These are finished kits with the correct number of samples, and labeled in the correct order so that they will fill the pad layout correctly.
Software that works well with the Numbered Files option is listed below.
The Numbered Files page has more info and visual instructions on how to import the files into these DAWs.
Some of these DAWs have their own Kit Maker page, showing info specific to that DAW.
- Maschine
- Logic Pro X – Drum Machine Designer
- Reason (Kong and Umph)
- Bitwig Studio
- Geist2
- Groove Agent SE 5
- Roland SP404 MKII (use the SP404 Layout in the dropdown)
- Koala Sampler App (use the Koala Layout in the dropdown)
- Novation Circuit Tracks / Rhythm
- iMPC 2 (iOS)
Transferring to iOS Devices
You can transfer your kits to your iOS in a few different ways.
If you are on Mac, you can use the Files software to transfer files to your device.
Another way is by using the Files app or transferring using a Cloud services such as iCloud or Dropbox. Each iOS app imports files a little differently. View our Youtube videos or consult each apps’ manual on importing files if you have issues.
Legal Stuff
Kit Maker is a file organization app that can process samples and make ready-to-use kits for a variety of popular music programs. It is third party software and not associated with any of the companies or DAWs mentioned below.